Stir Fry: Harvest Special
I didn’t grow a ton of veggies in the garden this year. I did have a substantial carrot patch, a mix of Touchon and Purple Dragons. I also had a pair of Fairy Tale eggplants, some Pablano peppers and a good amount of Tatsoi bak choi. Needless to say, all of these things came to meet one another in My wok. With a few additions, a very nice meal was spawned. There is just nothing better than garden fresh food! Here is what I did for the first meal after harvest. Paired with rice, noodles, or bread, this recipe serves two ravenous teenagers, or four average appetites.

Supplies Needed: Knife and cutting board. Wok, or large, high sided fry pan. Large bowl, or zip-lock bag for marinating.
Ingredients:
1.5 pounds of pork tenderloin, thinly sliced
3-4 large carrots, chopped into pieces no more than a quarter inch thick
4 small eggplants, sliced about a quarter inch thick(Kamo eggplants are best for frying)
1 large onion, chopped to Your liking
2 pablano peppers, diced
1 head of bak choi, stems removed(about 30, 3-4 inch leaves)
a quarter cup of dry sherry
1 tbsp of lemon juice
2 tbsp of hoisin sauce
salt and pepper to taste
bacon grease(I love bacon grease!), or Your choice of cooking oil.
Prep and Cooking:
Mix the sherry, lemon juice, hoisin and pablano peppers in a large bowl, or zip-lock bag. Add the pork and let marinate for at least 30 minutes(over night is best). Over medium-high heat, stir fry the carrots until they reach Your desired texture and remove from pan. Then stir fry the eggplants with black pepper and a pinch of salt and set aside as well. Now start cooking the onions, when they start to turn translucent, turn the heat to high and add the pork and liquid mixture. Stir fry on high until the meat is done cooking, then reduce heat to medium and stir in the bak choi. Then, turn off the burner and mix everything together. Plate and serve!
Notes:
Obviously, nearly any meat will work with this recipe.
Pablano peppers are really mild, this is not a spicy dish…
If using mock duck, marinate for no more than 5 minutes. Add the liquid marinade to the onions and let it thicken a little, before adding the mock duck to the fry pan.
Running short on time? Skip the marinating part, simply put the liquids and peppers in the pan when You go to cook the meat. It will still taste great, but the meat won’t be quite as flavorful.
Most varieties of eggplant will cook VERY fast and fall apart, becoming mush. Which is why I suggest Kamo eggplants, which hold their texture very well compared to every other variety. If using another kind of eggplant, You must pay close attention to the texture, once You can dent it with Your finger, remove from the pan immediately. Some eggplants are very moist inside, laying them on a dry towel or napkin after slicing(before cooking) can dry them a bit and thus help keep them from disintegrating as You cook.
You can use the bak choi stems if You like. Chop them up like onions and fry until tender after You cook the eggplant.
Cooking each ingredient separately helps mix up the flavors that hit Your tongue. You can indeed cook the carrots and onions together, then add the eggplant and meat. Stir frying till everything is done, but You end up with a more uniform flavor, which is good, but lacks the depth of each ingredient. You also have more control over the texture of each thing when cooking them solo…
I admit to using too much bacon fat in making this one. You may have noticed by the glossy nature in the photo… It was delicious though!
Pulled Pork Sandwich, Assemble!

This was just My second attempt to make pulled pork. As You can see, I went in to geek mode with My camera. Just a little bit anyways. The lighting in My kitchen is pretty poor, even by the windows, so I will likely try this animation again sometime with a better lighting arrangment. Using whole wheat hot dog buns, bak choi picked fresh from the garden, diced onions and barbeque sauce, these sandwiches came together quite well.
The hours I work have My schedule a bit off from most peoples. I go to bed around five in the morning and wake up around noon. So I started the pork in My Instapot when I went to bed and it was done when I woke up the next day. The first time, I started it before I went to work and it was ready and waiting for Me when I got home. I do love the set it and forget it style of cooking involved with making this tasty, meaty, dish.
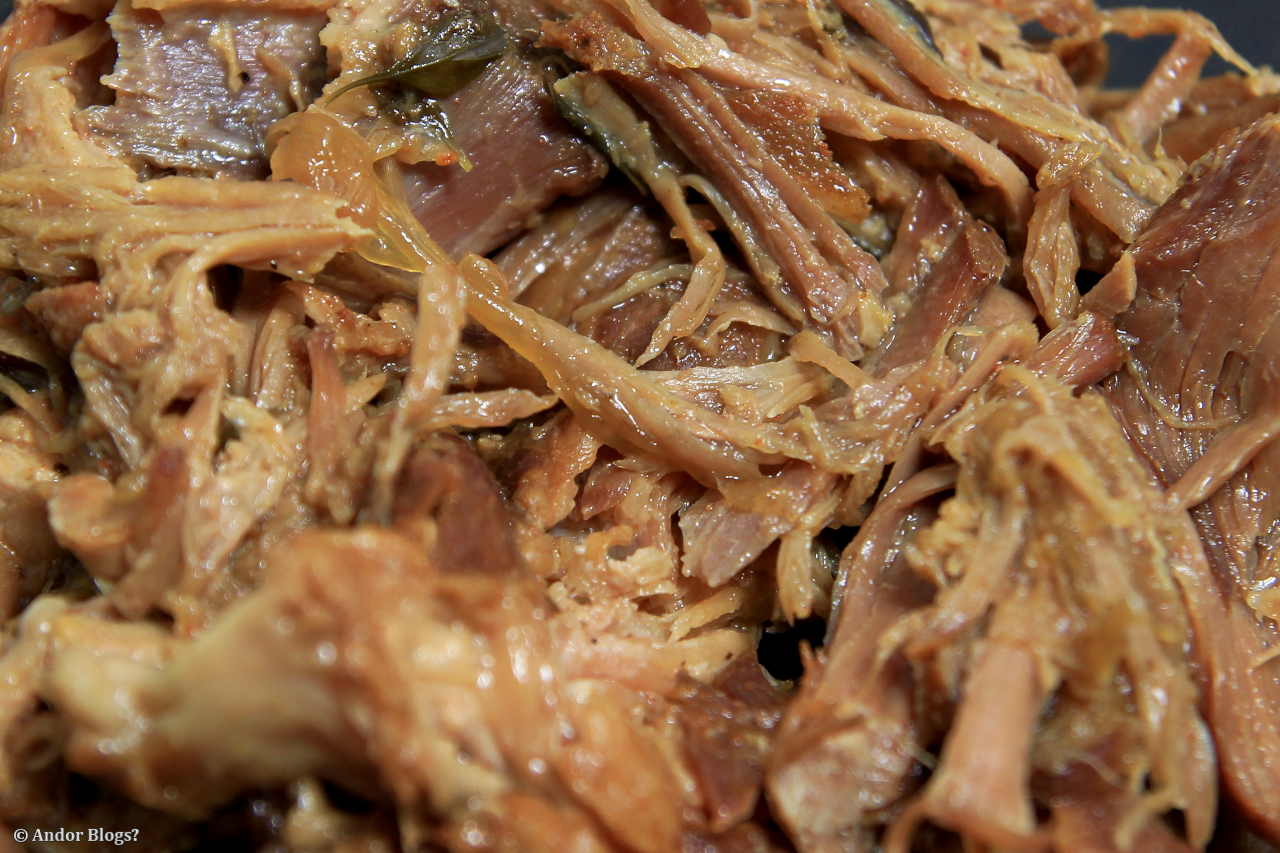
To make the pulled pork, You will need a slow cooker, such as a crock pot, adjustable rice cooker, or sommething of that nature. A three to four pound pork shoulder, or butt. Sprinkle 2+ tbsp of lowry’s seasoned salt, 4 tbsp cajun spice blend and a third of a cup of tightly packed brown suger all over the out sides of the meat. Put an onion or two, peeled and halved into the bottom of You crock pot, along with a third of a cup of dry sherry, 2 long sprigs of thyme and two large cloves of garlic. Then place the pork on top, cover and slow cook for 6 to 8 hours. Once the meat is super tender and falling apart, remove it from the cooker and use a pair of forks to pull, or shred the pork, removing and fatty chunks and bones as You go. Serve it with Your favorite side dishes, or make sandwiches, wraps, or even eat it all by it’s self. There should be plenty of juices in the bottom of the pot, add some to the pulled meat to keep it moist and flavorful, especially if You are refridgerating some of it for later.


Cooking in the Twilight Hours
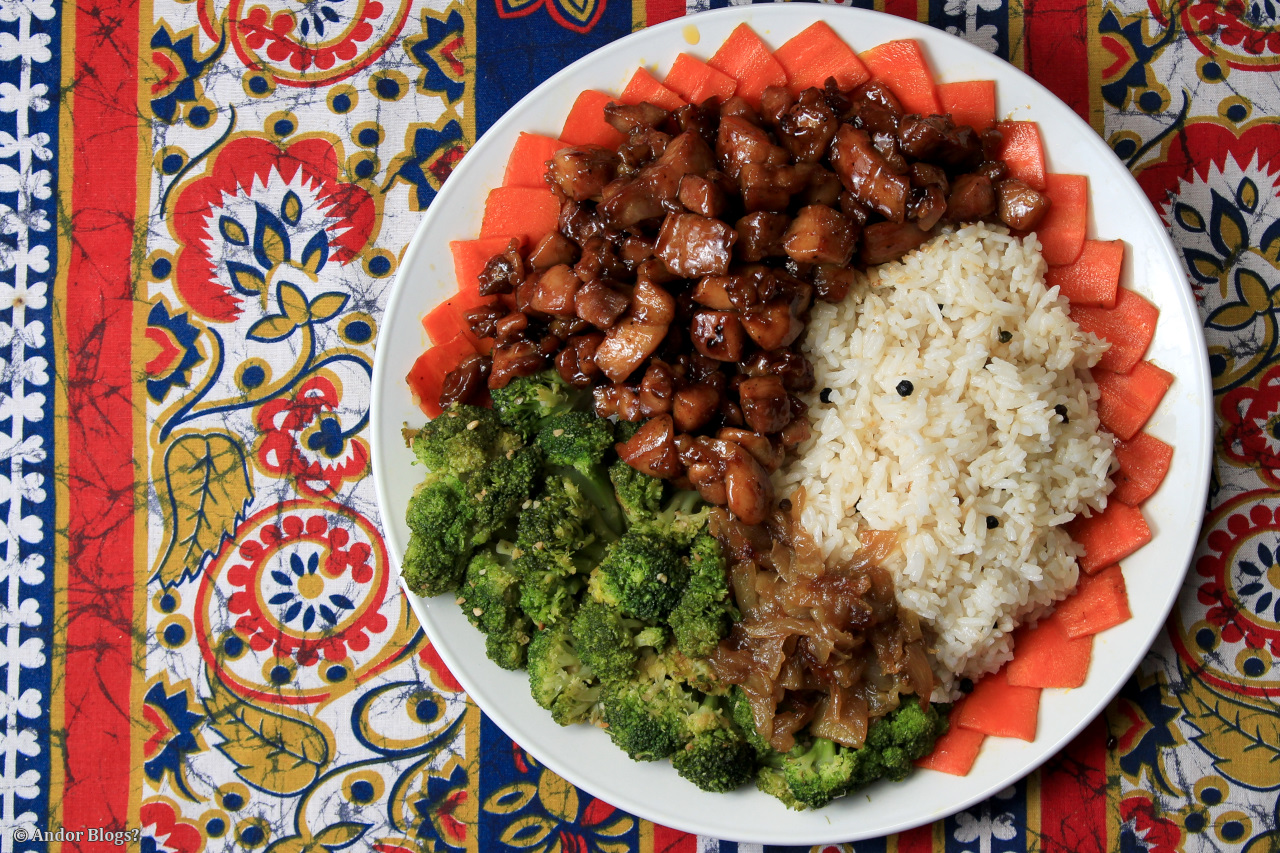
I often find Myself cooking between two and four in the morning. Not sure why, but this is when the proliferation of stir-fried creations tends to happen. In this case, a very simple set of ingredients lead to yet another delicious meal. Chicken in a salty caramel sauce, lightly fried veggies, caramelized onions and peppercorn rice. The chicken is a bit of a rip on a Vietnamese style Ga Kho, or as most of us call it, hot and spicy chicken. I simply omitted the fish sauce, lemongrass and ginger instead using seasoned salt. The rice was quite nice. It’s subtle, like sushi rice, until You bite on a peppercorn. If You use white pepper, it will be quite spicy. Other varieties emit a mild peppery flavor, but most of the bite dissipates while cooking. The onions took Me three hours to get to that amazingly sweet, gooey texture. If You skip that part however, this meal can be prepared and cooked in thirty to fourty-five minutes. Even faster if You make the chicken in one pan and the veggies in another.
For starters, chop up 2 medium to large onions and cook over low heat until caramalized and set aside. Don’t worry if it looks like a lot when You start, they will be dramatically reduced as You cook. This can take hours, but it is so worth it.
In Your rice cooker, or pot, add 1 cup of rice and 1 tbsp whole peppercorns, mix until the pepper is evenly dispersed. Then add 1.5 cups of water and 1 tsp of rice vinegar. Mix thoroughly and cook until the rice has reached Your desired texture.
While the rice is cooking, thinly slice a medium sized carrot and fry over medium heat to Your liking and remove from the pan. Then, stir fry 1 cup of brocolli with 1 cloves worth of minced garlic and a splash of soy sauce. Once finished, remove from the pan and wipe it clean.
Now, over high heat, stir fry 2 chopped up chicken thighs with 1 tsp rice vinegar, half a tbsp of lowry’s seasoned salt and 2 tbsp(or more!) of brown sugar. Cook until You have a thick brown caramel glaze and You are done. Enjoy!
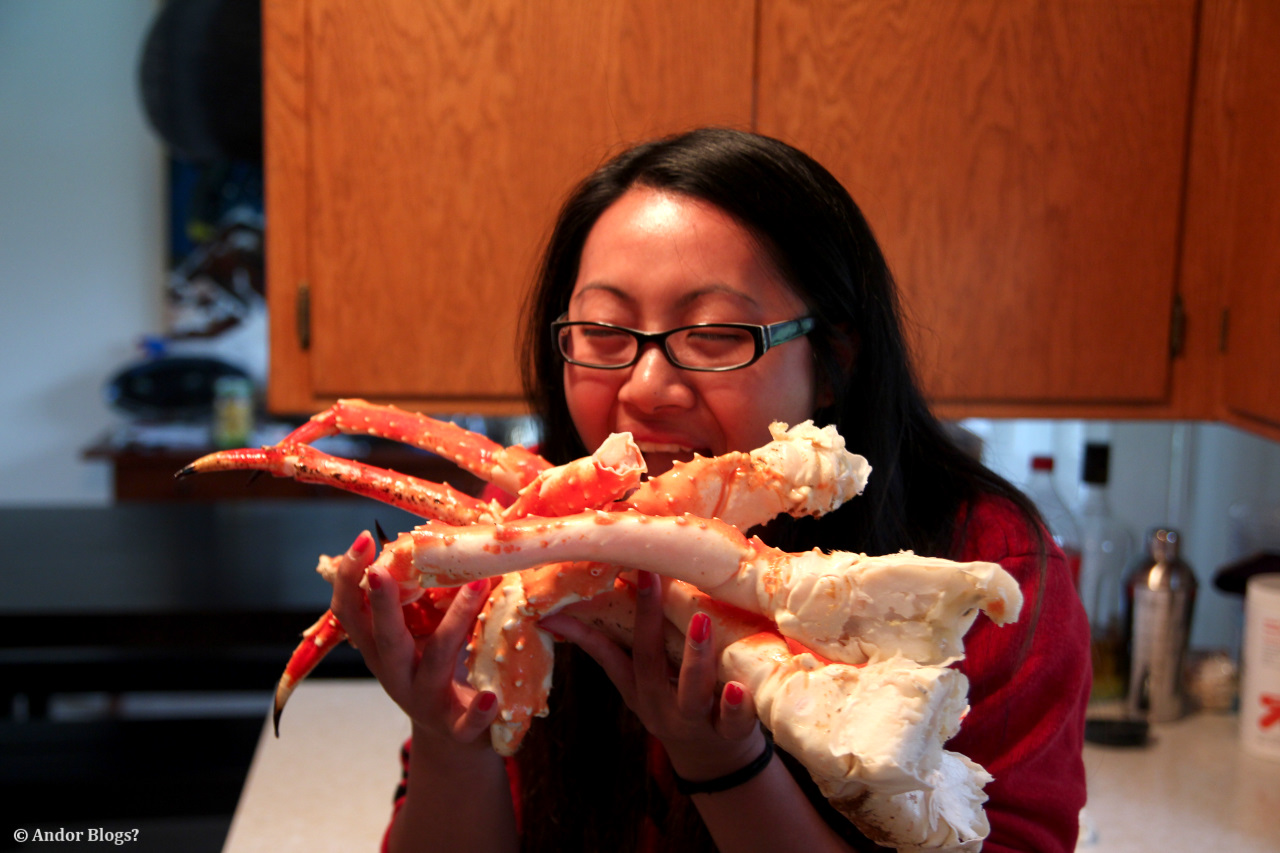
A Crab Dinner for Burd

About a month ago I noticed a sign at a restaurant near My work. It said “all You can eat crab on Tuesday nights.” I immediately thought of Burd, My Brother’s wife, who is a foodie through and through. She loves seafood with a passion too. I shot Her a text and plans were made to attend this early week crab devouring. The next week, Tuesday arrived, the sign was gone. I stepped inside and asked the hostess if they were still doing it and was told, “no, so few people came that it’s been cancelled.” Our 5 day mental build up to this potential crab feastery was put down, hard.
Last week, was Burd’s birthday. Instead of a long lasting gift and inspired by recent events, I chose to give one that disappears rapidly. I went to a couple of shops around town, as well as surfed the internet. The web in fact led Me to the place which delivered these massive legs and claws to My door. It was slightly more expensive than getting the red king, golden king, or opilio crab legs found locally, but those were all so tiny by comparison.. Having read that the larger crabs tend to have a more robust flavor and sweeter meat, paired with My tendencies to go big, led Me to order 8 lbs of red king crab. Directly from Alaska. The biggest legs I could find were delivered to Minnesota, in under 18 hours.
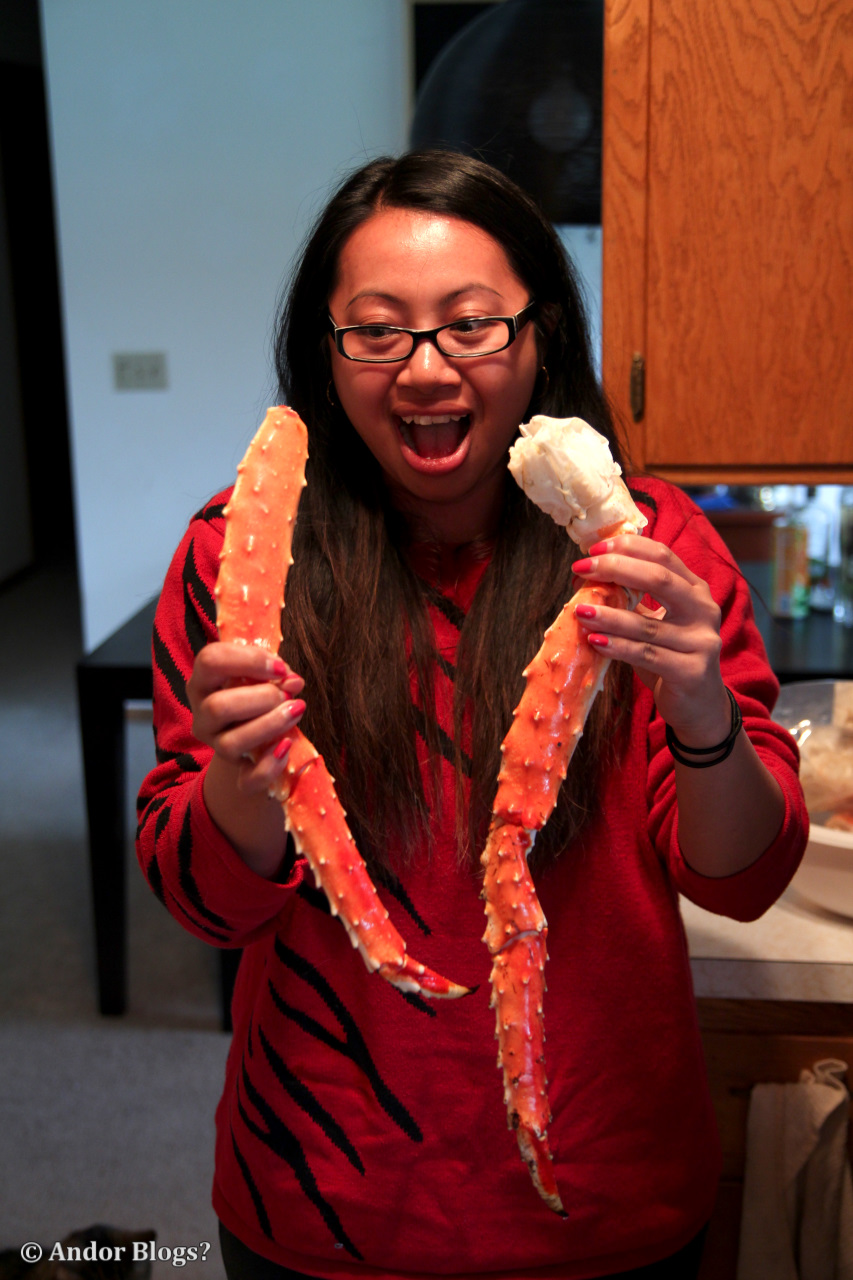
I had told Burd, prior to Her birthday, that I was going to get Her a hammer as a gift. Which I gave to Her as We were departing a small car dealership in the southern suburbs. She was looking to buy a new car, possibly as a present to Herself? She was struggling to find a way to thank Me for giving Her a two pound mallet. Having arrived there seperately, She headed home in Her car and I headed there with My brother. We stopped at a store along the way and made it to their place before the birthday girl. Who then learned why She was holding a large rubber hammer. A knife works, but is slower and let’s face it, less fun…
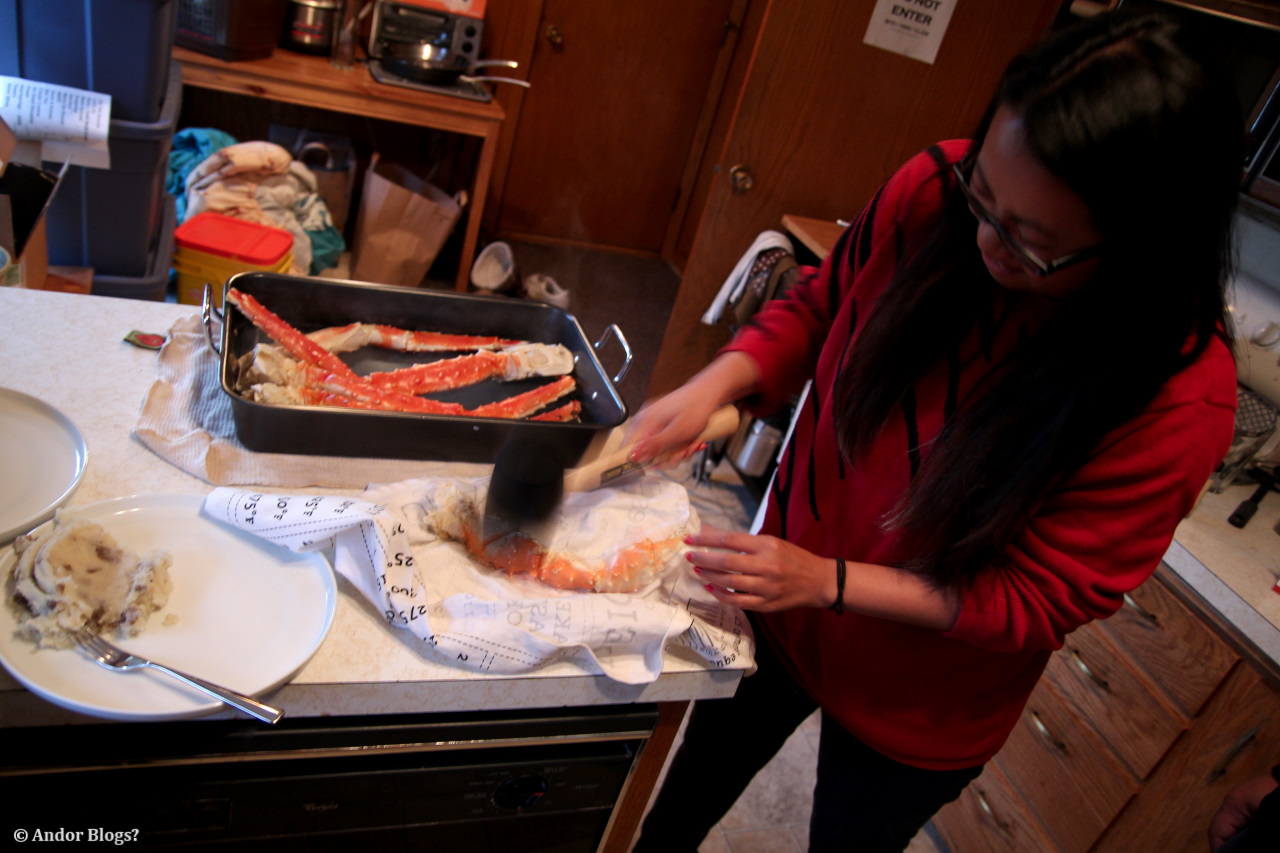
I have had crab on many occasions. Nothing quite like this however. So succulent, arromatic and the beautiful color. Tasting of it made one feel so fat, so quickly. It was like devouring small, puffy clouds of sweet, tender, meaty goodness. These huge crab’s legs were just amazing. Without question, the single most luxurious thing I have ever eaten. I hardly even bothered dipping in butter, it was so delicious without any seasoning at all.

Fancy Feast

Last fall, I headed up to northern Wisconsin with My brother and some friends. During that trip, two of the bunch proposed a monthly cook-off. The original theme was simply ‘make Your s*** fancy.’ What can I say, it was a weekend of drinking, shooting and dirt bikes. The feast idea changed slightly after that and starting this past January, Fancy Feast had begun. Instead of making it a competition, it is a slightly less intense meal making endeavor. Four courses minimum, guests bring a bottle of decent booze as tribute, or declare themselves the next host/cook for the feast.
First up was My friend Keith, who made some beet and cheese appetizers that were quite good. Followed by a lobster and shrimp torta with lima beans, avacodo topped with seasoned cream cheese and an encrusted herby salmon bake. Then, He banged out a lovely candied bacon, puffed cream and brownie desert.
")
")
")
")
")
February went to My brother, Chris. Churning out seven dishes and various drinks. I did however neglect to catch a picture of the fresh pumpkin bread desert. Pictured are His mushroom soup, with leeks. Egg cooked in swirling water and hash, a topper variety plate, cold soba and soy sauce, what I think was a chorizo dish and meatballs cooked forever in a pho soup stock.
")
")
")
")
")
")
I called March’s meal. My theme was simply to do something different. So, no stir-fry. No grill, or smoker. No cajun spices, chili blends, sherry, or even soy sauce. I struggled a bit, making multi-course meals that come round after round doesn’t mesh particularly well with My laid back, ‘just throw some stuff together and hope it’s good’ cooking tendencies. I produced the minimum of four dishes. Bacon and baby lima bean soup, spicy sweet potato mash with roasted brocolli and pistachios on toast, fruit stuffed pork tenderloin roll and finished with citrus gratin. The desert was kind of odd honestly, but it had much potential to be delicious. Something to ponder on how to go about improving.
")
")
")
")
Back for More? Indeed.
Tonkatsu Ramen has suddenly become a bit of a saturday ritual. So filling, so delicious. This time one of us ordered it without chili oil, exposing the hearty white stock. I always tell Myself, ‘next time I will order something else from the expanding menu,’ but it has yet to happen..
")
")
Double Pork Fried Rice
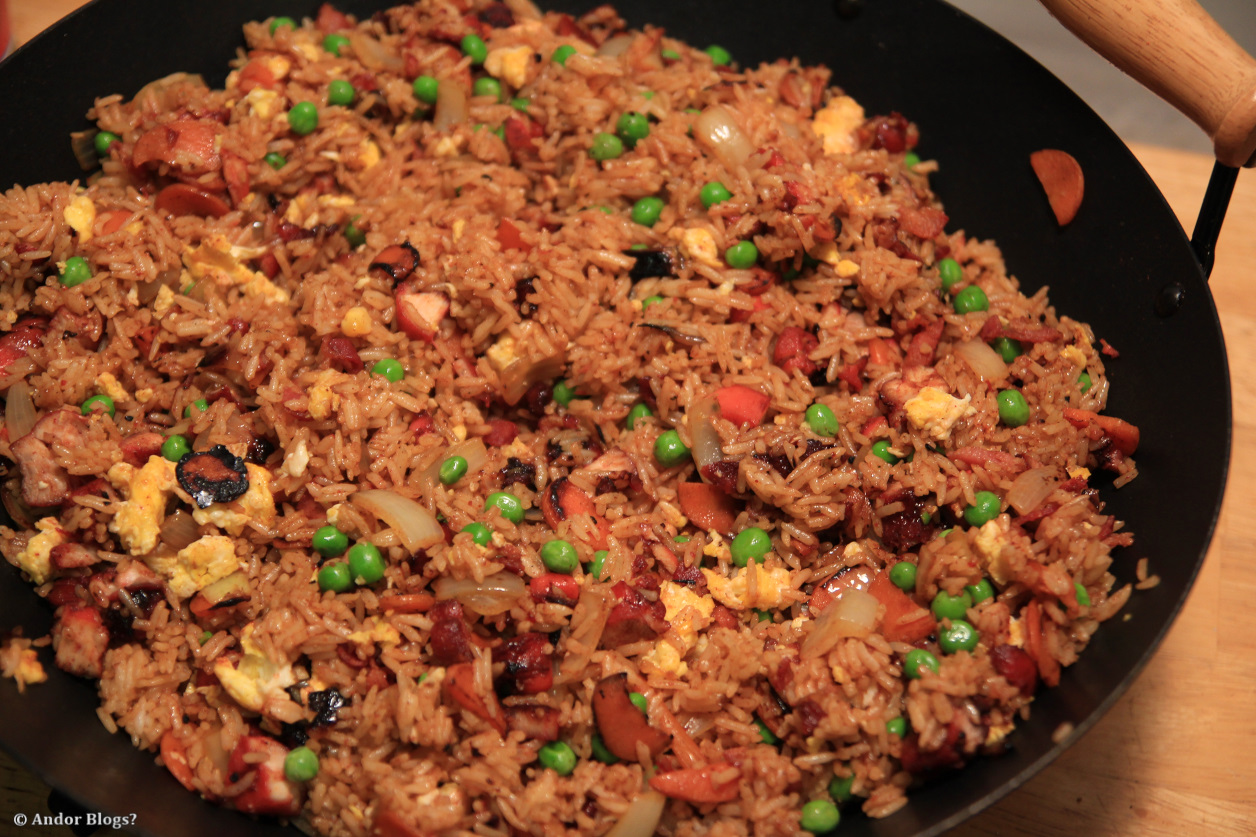 One of humanity’s most varied edibles. After a decade or more of experimenting and constantly trying different things, I have settled on a flavor arrangement closer to americanized asian restaurant versions of this classic home-style favorite. The sweet soy sauce, or alternately kecap manis, combined with rice vinegar and soy sauce is the winning formula at a great many asian restaurants here in North America. For Me, Simply add eggs, sweet peas and bacon, everything else is optional. The following recipe is my dressed up version which is very much a stand alone meal. Adding chili powder for increased depth to the rice it’s self, while also including carrots and onions, along with savory marinated pork. By cooking these things separately and mixing them together only at the end, You get a wonderful burst of the different ingredient’s flavors in every bite. Serves 4 as a main dish or 6+ as a side dish.
Supplies Needed: Large Wok or Fry Pan, Knife and Cutting Board
Ingredients:
2 cups of White Rice, steamed or boiled(slightly undercooked, or day old rice is best)
1 pound or so of Pork, Your choice of cut, chopped into half inch pieces(or smaller)
4 Eggs
One third of a pound of Bacon, sliced into pieces a quarter inch wide
3 medium sized Carrots, sliced thinly
1 large Onion, chopped as well..
Half of a bag of Frozen Sweet Peas
4 tbsp of Soy Sauce
4 tbsp of Sweet Soy Sauce or Honey, or 1+ tbsp of Sugar)
3 tbsp of Rice Vinegar
1 or 2 fresh Garlic cloves, minced
1 tsp of Chili Powder Blend
1 packet of Chinese Barbeque(Char Siu, Red Pork) Seasoning
Cooking Oil as needed
Prep and Cooking:
You will need to marinate the pork in the chinese seasoning for 30 minutes or more before cooking, over night in the fridge is best. Once it has soaked in the flavors, remove from the marinade and stir fry on high heat until fully cooked. I preffer a bit of charring on My red pork. Remove from the pan and set it aside for now. Rinse out the pan before continuing.
Over medium heat, scramble the eggs. Once cooked, remove, wipe any extra residue from the pan, then stir fry the bacon to Your liking and remove from the pan. There should be plenty of bacon grease now. You can poor off the excess, or just leave it all in. Stir fry the carrots until they start to soften, then add the onion and cook until the desired texture is reached. Remove from pan. Next, put the cooked rice into the pan, adding all of the remaining seasonings. Stir until everything is evenly mixed in, add the frozen peas and stir until they have thawed. Turn off the burner mix everything You have cooked together in the pan and serve.
Notes:
Things go much faster using a skillet and a wok at the same time. Cooking the bacon, then veggies, followed by the rice in the wok and the eggs and then meat in another pan. Mixing it all into the wok at the end.
Ramen, Lovely Ramen
United Noodles is a bit of a back alley grocery store. Specializing in foods from nearly all corners of asia, they are one of the oldest asian grocers in the Twin Cities. Within this store is another store, a small deli. Called Uni Deli, this place has an extremely short menu, but that is okay, because one of the eight things listed for You to have served hot and delicious is Tonkatsu Ramen. Oh My, I had not been there in about a year and My taste buds have been blown away again. How do I forget to keep going back for more? If You go there and do not order tonkatsu, You are missing out. Order it spicy, simply the best.

Andor’s Traditional Ribs!
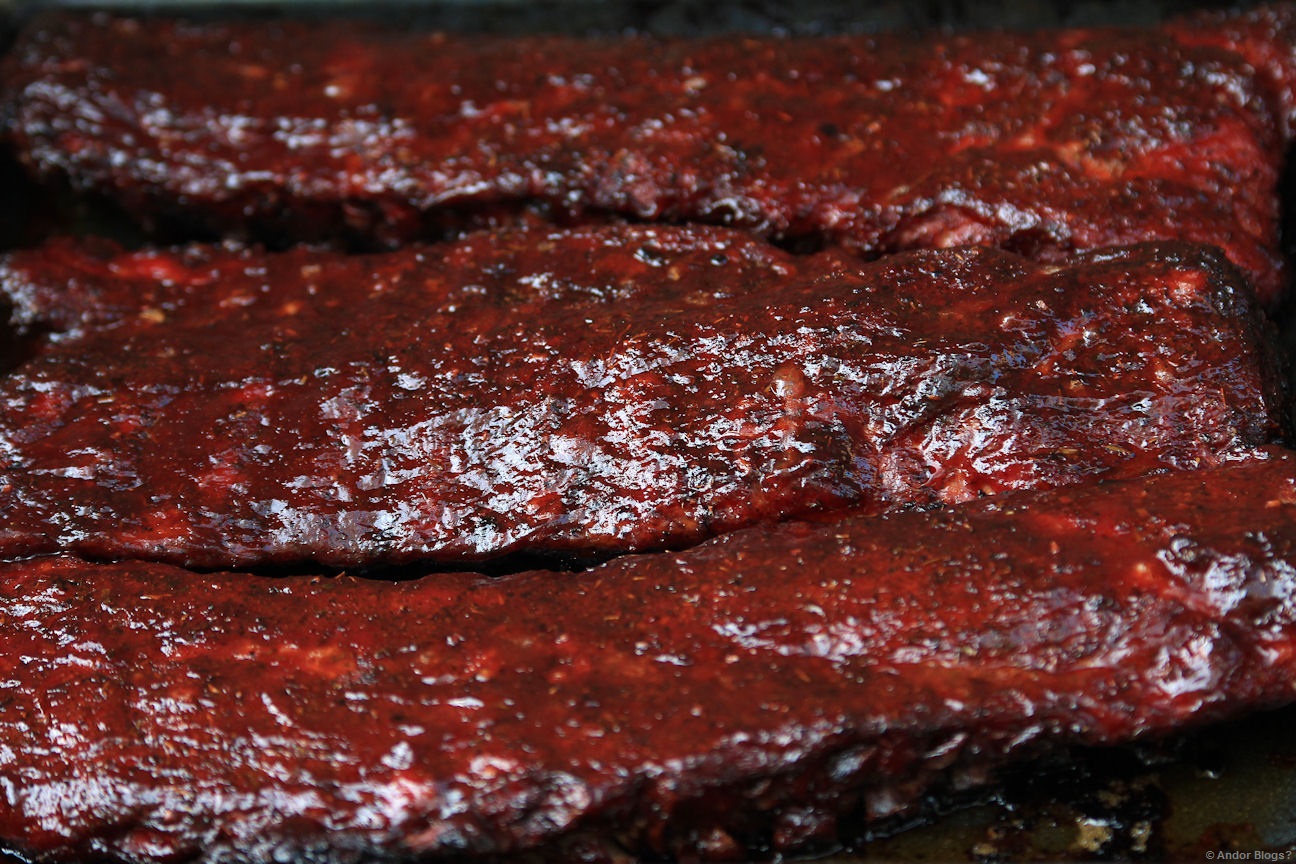
Yes! This is it! The ribs I served for several years at gatherings of many varieties. This is a time consuming recipe, but it’s actually quite simple and pretty easy to accomplish. The seasoning is a pairing of sauce, dried herbs and spice blends that are available at most big box grocery stores. If You have eaten My ribs in the past, You were very likely devouring the following recipe..
With that said, this is slow cooking! It’s very simple, but since You are cooking at low temperatures, it takes a while. Barbecue is different from grilling in that You tend to use indirect heat. Many hours will pass by once the actual cooking commences and every 20 or 30 minutes, You’ll be adding wood to the coals, flipping racks and spreading thin layers of sauce! One must have the dedication to give 4 to 8 hours of loving to Your ribs for them to acheive that highly desirable, fall off the bone texture. As such, I have divided this up into two recipes that have the same seasoning arrangement. ‘The Way of the Food Junky’ delivers the afore stated texture, as well as that lovely smokey flavor. Taking 5 to 8 hours depending on the temperature in Your smoker/grill and the thickness of the meat being used. ‘The Slacker’s Attempt’ is done at higher temperature in the oven, which means it cooks through in 3 or 4 hours, but brings forth tougher meat. Both do taste quite good of course!!
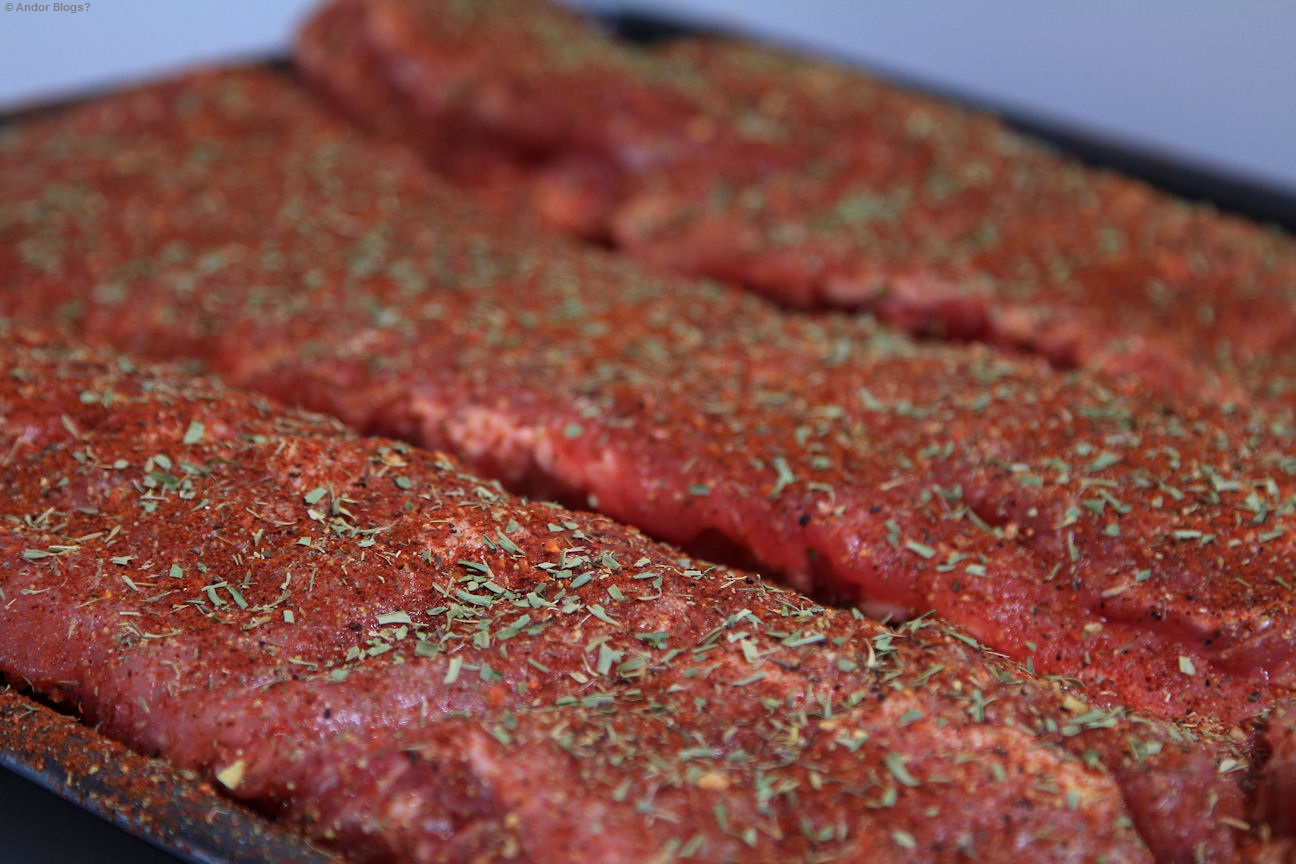
Ingredients(listed per 1 rack of pork spare ribs with the cartilage tips not trimmed):
1.5 tbsp – Garlic Granules
3 tbsp – Chili Powder Blend(the kind for making chili!)
3 tbsp – Ms. Dash Lemon Pepper Blend(or 2 tbsp of regular lemon pepper)
2 tbsp – Dried Thyme Leaves
2 or 3 tbsp – Dried Terragon Leaves
2 tbsp – Freshly Ground Peppercorns(the multi colored peppercorn blends will add a lot more depth than just black pepper)
Salt to taste, although, I’ve rarely ever salted this recipe…
3/4 of a cup or so of BBQ Sauce, We all have our favorites, or hate the stuff. This recipe is based on the thick midwestern, tomato based sauces. I use Ken davis, which is from Minnesota and Sweet Baby Ray’s, which I beleive is from Illinois.
The Way of the Food Junky: The First Method
Supplies Needed:
Baking sheet with raised edges that is large enough to hold Your rack of ribs. A Very sharp knife for slicing. A brush, fork or spoon for spreading sauce. Smoker or large grill(You don’t want your ribs near the coals). with enough of a tasty hardwood(cherry and hickory are My main choices) or charcoal(1 to 1.5 standard bags), to keep a decent temperature for 6+ hours. If You are using charcoal, You shall also require chips/chunks of one of the afore stated woods, along with a large bowl or 1 gallon bucket, with water high enough to cover the wood chips.
Prep:
Get Your smoker or grill started. I tend to start large in My modest smoking pit. If using a regular grill however, You’ll be needing a very small pile of coals. The desired temperature is about 260F, starting a little hotter than that won’t hurt at all. I would avoid going over 300F for any period of time when Your cooking. While the fire burns out and becomes coals to cook with, You’ll be seasoning Your meat.
On Your baking sheet, lay the ribs in-side up(the bones should be curved like a shallow bowl). Evenly spread half of everything EXCEPT the sauce across the ribs, press or pat them in a bit, so the herbs don’t just fall off and flip the rack over. Spread the remaining herbs and spices over the top side of the ribs and press them in a bit as well.
Once You’ve got coals instead of flames, it’s time to get smokin’
Cooking:
If using a smoking pit, simply place Your ribs on the rack and close the lid. For charcoal users, You’ll need to soak the wood chips in water for an hour or so before use. Add wood/charcoal to the coals as needed to maintain the desired temperature of 260F or so. When adding to the coals, it’s best to spread them out a bit and put the fresh stuff centered on top. This will get the new stuff burning and formed into coals the fastest, as well as add a perch for the wet wood chips, thus protecting the coals. Some put the chips in foil, I just lay it on the top in a fist sized lump. Every 20-30 minutes, You’ll need to add another fist-full of wet wood chips to the top of the coals, so as to keep the smoke billowing out.
Continue this cycle: flipping the ribs before adding more charcoal and wood chips, every half hour or so until the meat seems fully cooked, but not yet tender. On a hot summer day, this can be done in about 4 hours, however, on a cool spring or fall morning, it will likely take 6 or more hours to get it cooked through. Then, You want to start brushing on the sauce in thin layers, while continuing the flipping and adding to the coals cycle, adding sauce every time You flip the ribs. Keep it up until You can wiggle the bones away from the meat. Remove from the grill and let the rack rest for 10 minutes before slicing and serving.
The Slacker’s Attempt: The Second, Shorter Method
Supplies Needed:
A baking sheet with raised edges and a sharp knife for slicing. An oven safe bowl with 1 or 2 cups of red wine or sherry and an equal amount of water. A brush, fork or spoon for spreading sauce.
Prep: Preheat Your oven to 400F. Season the ribs as described in the prep section above.
Cooking:
Put the bowl containing the watered down wine on to the bottom rack of the oven. Place the pan laden with ribs middle rack of the oven and immediately lower the tempurature from 400 to 300. Bake for an hour and start flipping them every 30-45 minutes for an additional 2.5 hours. The meat should be just about cooked to the bone at this point. If it doesn’t feel cooked, then let it bake a while longer. Sauce the bottom of the ribs first, then flip and sauce the top side. Place the ribs back in the oven for 20 minutes, or until the sauce has thickened. Remove from the oven and let it sit for 10 minutes before slicing and serving.
Notes:
All cooking times will vary depending on the tempurature, thickness of meat and bones, etc…
On a regular grill, such as a Weber, You’ll want to shove the coals off to one side and place the meat on the rack as far away from the heat as possible. If You can’t manage to cook without burning the edges, You may want to consider starting the ribs on the grill. Using very little charcoal, but a lot of wood in a short period of time, say 45 minutes to an hour. Then place the ribs in the oven at 260F to actually cook them. This will give You a nice smokey essense and reasonable control over the texture of the meat. This is also the best method for those who live in the north. Trying to smoke food in temperatures under 20F tends to give a more jerky-like texture. As well as force You to use 3 or 4 times the amount of charcoal.
I use to peel the membrane off of the under-side of the ribs, but in the last couple years, I have swayed away from this. Leaving it in place does reduce the thickness of the smoke line(the red’ish color in the outer sections) in the meat and thus decreases the smokey flavor slightly, but it makes it a little easier to control the texture by holding in more moisture. It’s a preference thing that I don’t think makes much of a difference.
Using the ‘Slacker’s Method’ You can also achieve that succulent, fall off the bone texture. Instead of cooking at 300, lower the temperature to 260 and add an hour or two to the cooking time.
This recipe is actually pretty tasty without the sauce, so long as You don’t burn the spices and herbs during cooking. This will make it a bit bitter. It’s better to use fresh herbs if You’re going this route though.
The Charcoal quantities listed are for use with My pit smoker which has a 15×18 inch burning chamber and a 15×30 inch cooking area. You’ll use less with a normal grill.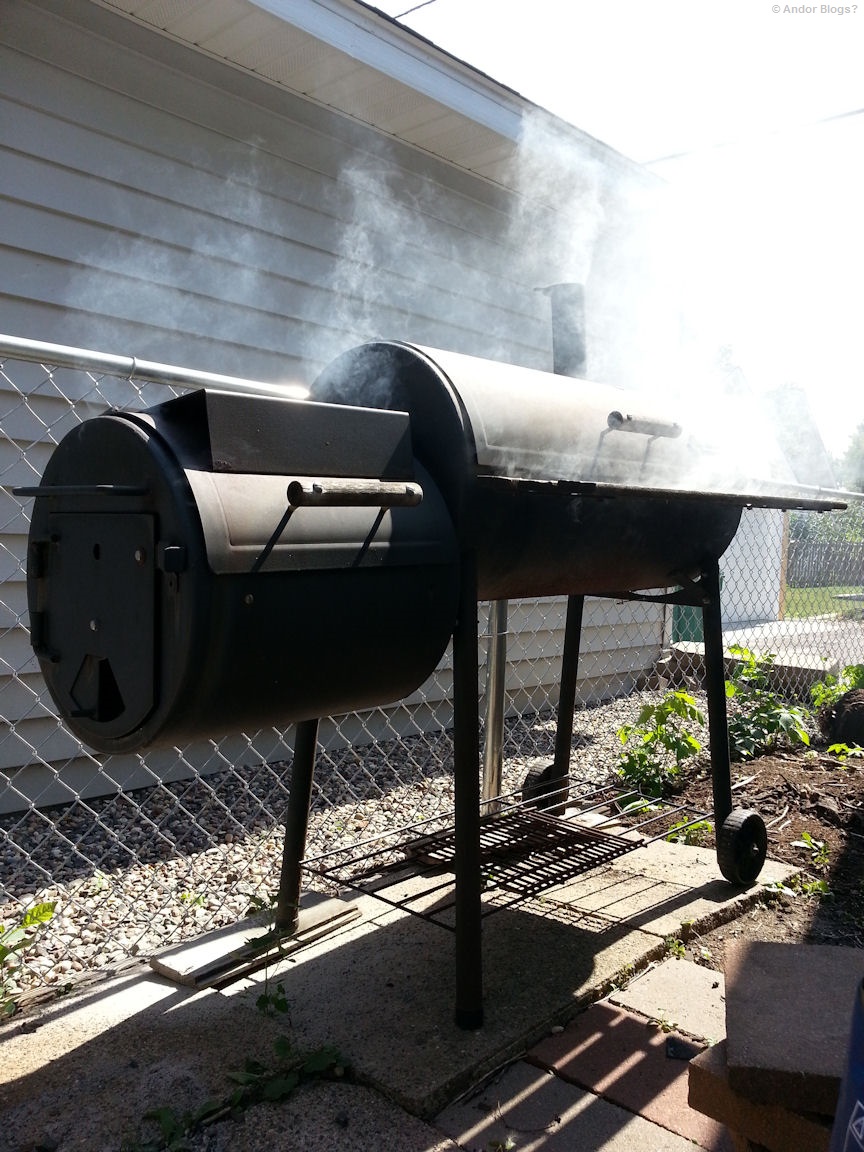
Spicy Garlic Chicken and Broccoli

My cooking style has always been to throw a bunch of things I like together, then hope it’s delicious… That’s how I made this one 5 or 6 years ago. I’m not sure how I lost this recipe, which was the most popular on My old site. I recently found it on an antiquated external hard drive that I haven’t been using, so here We go. One of the great many flavor combinations I’ve stumbled upon over the years. A good blend of savory, sour and sweet, followed by a round of heat! As with all Stir Fries, this is straight forward, fast and quite easy to make! Matched with a side of bread, noodles, or rice, this serves about 4 people.
Supplies Needed: A Wok or High Sided Fry Pan, Knife and Cutting Board. As well as a Large Bowl, Pot, or Pan to shuffle the cooked veggies onto while the meat cooks.
Ingredients:
2 or so lbs of Boneless Chicken, chopped
1 Bag of frozen Broccoli, thawed
6 to 8 large Garlic cloves, minced
1 Habanero Pepper, de-seeded and minced
1 large Onion, chopped
2 Carrots, finely chopped
3 tbsp of Rice Vinegar
2 or 3 tbsp Soy Sauce
1 and a half tbsp of Lemon Juice
3-4 tbsp of Hoisin Sauce
1 tbsp Mild Chili Powder
1 tsp of Terragon flakes
half a tsp of Turmeric
2 tbsp of freshly crushed Black Pepper
1 tbsp of Sugar(optional)
and 1 or 2 tbsp of veggie/canola/peanut oil.
Prep and Cooking:
Using med-high heat, put half the oil in the pan and start frying the Carrots, once they’ve started to cook a bit, add the Onions, Turmeric, half the Pepper and a third of the Garlic, stir fry til the Carrots and Onions are about half way done, add the thawed bag of Broccoli. Stir fry until all 3 ingredients are done, then remove from the pan. You don’t need to clean the pan either.
Set burner to high heat. Pour the rest of the oil into the pan, adding the Chicken, Habanero and remaining Garlic. Stir it up a bit and add the Sugar and liquid ingredients. Stir it again and add the remaining seasonings. Stir fry until the meat is cooked through, turn off the burner. Put the veggies back into the pan with the meat and mix everything thoroughly. Enjoy!
Notes:
If You’re using fresh Broccoli, simply steam it and mix into the pan at the end…
Some stove tops will have high enough heat to make the liquids sauce down, which is good. Others will have liquid in the bottom when the chicken is done cooking, that’s fine too! It still tastes great! Just use bread, noodles or rice to soak it up!
Obviously, this works just fine without the Habanero Pepper, for those who can’t handle the burn.
Port Chicken
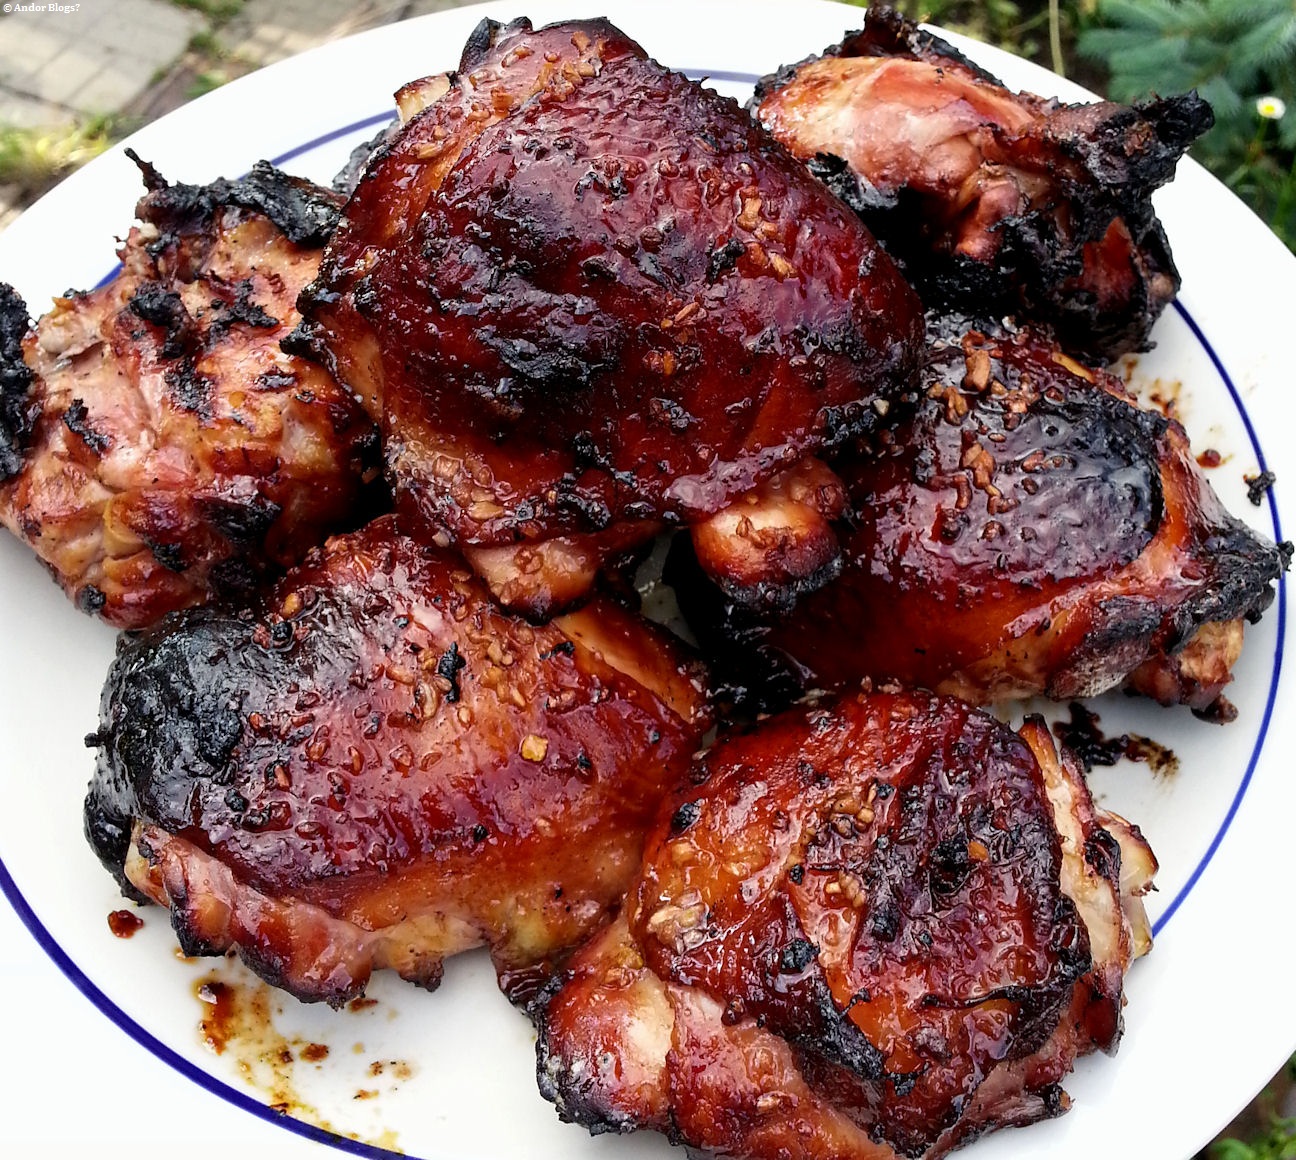
It doesn’t get much easier than this. The first time I made this, I roasted it in the oven. I made it again last weekend and opted to grill instead. Both times, it was quite delicious. Port wine and garlic provide the core of the flavor, with salt and honey accentuating the experience. Making for a solid base to add other ingredients to, which I shall venture in to soon. So long as You have time to let it marinate and take the time to baste as it is cooking, the meat should be very tasty!
Supplies Needed: Large zip-lock style bag, or a large bowl and a roasting pan, or baking sheet, with a raised edge to hold a bit of liquid.
Ingredients:
6 Chicken Thighs, with bone
3-5 large Garlic cloves, minced
3/4 Cup Tawny Port Wine
1/2 Cup of Water
2 or so tablespoons of Sea Salt
As much Honey as it takes to thinly coat the top of Your chicken, roughly 1.5 tbsp per piece of meat.
Prep and Cooking:
In Your bag or bowl, disolve the salt in the water. Warm water makes this go faster. Then pour in the garlic and port wine. Mix or shake it up to Your liking and put the chicken in. Let it sit in the marinade for 4+ hours for the best results, but You can rush it by going no less than an hour. Once You have let the meat soak in the flavors and are ready to cook, You will want to keep all the liquids in Your marinating bowl, or bag and lay the chicken out on a baking sheet. Pre-heat Your oven to 400(f), but when You put the chicken in, turn the tempurature down to 325 degrees. Let the meat cook for 25-30 minutes and then start basting. Spreading the marinade evenly over the top of the meat every 5-10 minutes, layer by layer making a nice glaze. While cooking, any time You open the oven You should be spooning a layer of marinade over the top of things. Even if You just want to peak, always baste as well, it will help to add more power to the impact of the flavor. Once the chicken is just about fully cooked, You will be adding the honey. Try to evenly coat the top side of the chicken and place back into the oven for about 10 minutes, or until the honey has thickened to a nice dark hue over the red-ish color of the marinade. Remove from the oven, let it rest/sit for a minute or 3 and serve.
Notes:
Just about any port should work with this recipe.
This would go very well with various herbs, citrus, or chilis. Thyme stands out to Me as a natural fit. I can think of plenty of other things too.
It doesn’t hurt to use a larger amount of salt, 4-8 tbsp, to create more of a brine. You will need to have an additional cup of port wine and 2 large garlic cloves, minced, for basting. Once You’ve removed the meat from the salty marinade, You would want to toss it out and baste with the extra wine and garlic. In this case, You may also want to baste fewer times, so it doesn’t just taste like wine.
For grilling, I would push the coals over to one side and place the chicken on the opposite side, using indirect heat, You can layer on the marinade and later the honey, without it burning so easily. Adding a chunk of hickory or Your favorite hard wood to the coals will only make things better.
Fruit Stuffed Tenderloin
")
")
")
A sweet and savory meat dish. It’s a recipe I stumbled upon while sifting through a stack of old family cook books a couple years ago. No idea why I didn’t attempt to make it sooner. Far more delicious than I anticipated after reading the ingredient list. If you use the right amount of apple juice in the roasting pan, you end up with 2 sweet sauces to accompany your meal. I drizzled the apple/dripping sauce atop some spinach and cooked down the last of the basting sauce to use for dipping. Loins cooked in this fashion would go well with some wild rice and steamed, buttered asparagus, or brussel sprouts, or as pictured, with fresh greens. Serves 8 to 12 depending on the size of your tenderloin.
Supplies Needed: Sauce Pan, Roasting Pan or Baking Sheet with high sides, Mixing Bowl, Cook’s String, and a Large Sheet or cutting board for prep. If Your tenderloin did not come in a vacuum sealed, leak-proof packaging, You shall also need something large enough to soak the meat in.
Ingredients:
1 Pork Tenderloin
1 Large Onion, chopped
3/4 of a cup of Bread Crumbs
half a cup of Dried Cranberries
half a cup of Dried Apricots, chopped
half a cup of Golden Raisins
half a cup of Apricot Preserves
1 cup of Apple Juice, possibly more.
1.5 cups of Port Wine
2 tbsp of Thyme
1 tsp or so of Cinnamon
1 cup of water
2 tsp or so of sea salt
Salt and Pepper to taste
Prep and Cooking:
First, mix a cup of the port wine, a cup of water and 2 teaspoons or so of sea salt. Mix until the salt has dissolved. Put Your tenderloin into the mixture and store in the fridge for at least 6 hours, rotating the meat as needed to get it soaking in from all sides.
In a mixing bowl, combine the onions, bread crumbs, dried fruit and a quarter cup of the port. Next, You must butterfly the tenderloin. Lay it out length-wise on a sheet or cutting board and slice down the side, half way up like a hot dog bun. Do try to make the top and bottom even in thickness, or it will cook un-evenly. After it’s cut open, salt and pepper all sides to Your liking. Lay it with the inside facing up and rub/sprinkle on the thyme and cinnamon, then spread the dried fruit and bread crumb mixture evenly over the meat, fold the tenderloin back up and tie it shut. Pre-heat Your oven to 350 degrees. Place the loin in the roasting pan, pouring the apple juice into the bottom of the pan. Roast for 35 minutes.
In a small sauce pan, bring the preserves and remaining port(1/4c) to a boil, stir until it starts to thicken up a bit. I started this sauce 25 minutes into the roasting on medium-low heat and it was a nice semi-thickened sauce, perfect for basting when I checked the loin at 35 minutes. Use this sauce to spread upon the tenderloin. You will want 3 to 5 layers for a nice sweet glaze. Continue to roast, basting every 5-10 minutes until the tenderloin is cooked fully, a meat thermometer should read at 160 degrees(F) or more. Remove from the oven and let stand for 5-10 minutes, slice and serve!
Notes:
This recipe is very sweet. The dried fruit and the port have a fair amount of sweetness to them, then You add the apricot preserves into the mix as well. If You can aquire some ‘less sugar added’ preserves, I would do so.
If You’re buying a tenderloin that comes in vacuum sealed plastic, You can make the brine/marinade with half of the quantity listed above. Cut a slit at one end of the packaging, drain the extra liquids and pour in the salted wine marinade, tying the end shut again with string, or twist ties. This is the most effective method for spreading the flavor, as well as using the least amount of wine/water/salt. On the other hand, those buying from a butcher, hunter or farmer will likely have to use a large bowl or cooking pot/pan of some variety. Which will require much more of the marinade to be made. If You have a ‘food saver’ or vacuum sealer, this might be a nice time to get some use out of it..
Turducken Test Run
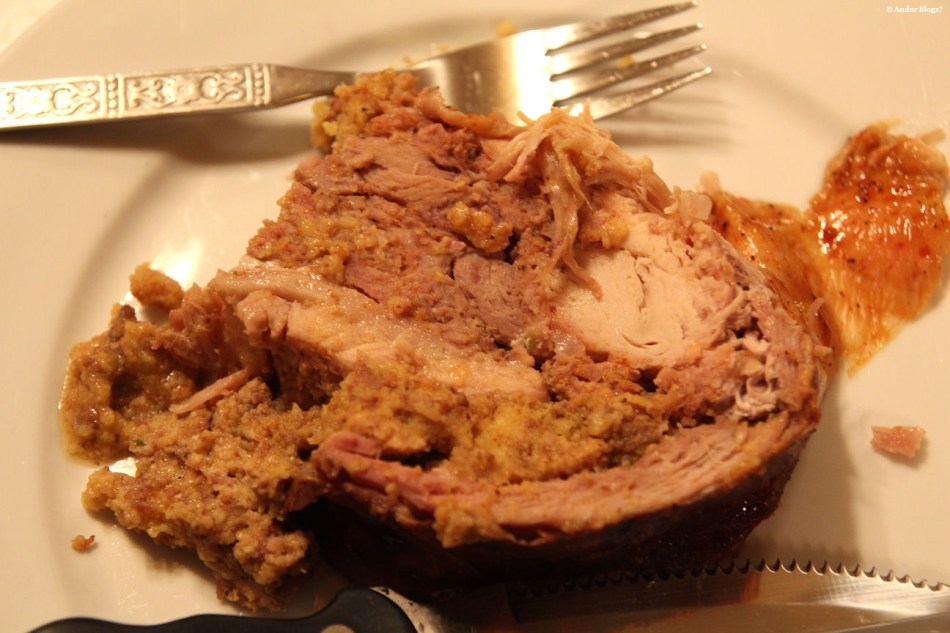
Turducken is one of those things You hear about in an almost mythical fashion. A bird, stuffed into another type of bird, then shoved inside yet another kind of bird, with sausage and dressing packed between the layers. Sounds rediculous! Yet amazing! How ever does one end up creating such a thing? Thanks to those people that did…
Over the years, I have looked at recipes and methods online, even found some web sites that will sell You a ready to cook turducken. Considering what to cook for the upcoming holiday feast, this legendary dish kept coming to mind. So, for My first rendezvous with it, I oredered up a small, pre-made turducken. Having browsed many sites, I settled on Herbert’s Specialty Meats, which appears to be a cajun grocer of some variety. After browsing their dozen or so stuffing options, I opted to go with the “traditional” pork sausage and cornbread dressing. A wise choice.
Keeping with the theme, it arrived in a box, which had a foam box inside of it, containing a bag with a bit of dry ice and, another box. Happily, this last of the boxes contained a 10 or 12 pound turducken, residing inside a vacuum sealed bag. It appeared to be heavily seasoned on the outside, this however, was not the case. Once cooked, I sliced it in half and carved up one side of the meaty mass. It was quite delicious, but very bland in it’s seasoning. This did allow us to taste each different type of meat as We devoured the thick chunks I had sliced off of it. I will be serving this on xmas for sure! I think the flavors will have to be added to though. Maybe a sherry and cajun spice injection will boost the experience up another notch. My brother suggested a garlic and butter injection, perhaps both are in order… Two small turduckens should make a fine holiday treat. What a spectacle of food, this, turducken!
")
")
")
")
")
")
Honey Garlic Chicken

A very simple classic! Highly adaptable to suit almost any pallet. Takes about an hour and a half for prep and cooking. Often garnished with Chives or Parsley and served with a Spinach Salad or Mashed Potatoes and Green Peas. Serves 2-3.
Cooking Supplies Needed: Roasting Pan, or a large baking sheet with sides at least half an inch tall. Mincer Or Knife and Cutting Board.
Ingredients:
12 or so Chicken drumsticks or 6-8 thighs, 6 large cloves of Garlic – minced, 8 tblsp Honey, half a tblsp of Rosemary(5-10 needles/leaves) – minced, Salt to taste.
Prep and Cooking:
Mix the Rosemary and Garlic and let it sit for 15 minutes. Then, Salt the Chicken to Your liking and rub the Garlic and Rosemary mixture all over it. Let it sit for another 15-30 minutes(in the fridge if it’s really hot).
Lay the Chicken out in a Roasting Pan big enough to allow all the Chicken to lay flat. Also making sure the Garlic is spread out on top. Roast at 400 degrees in the oven for about 20 minutes. Once that’s done, pull the pan out and drain any excess liquids, NOT the Garlic tho! Pour the Honey over the Chicken, coating as evenly as possible. Roast for another 20 minutes, OR until the Chicken is a nice crisp glossy brown. Plate and serve.
Notes:
You may require more Honey, don’t feel bad, just do it! Works very well with the following: pepper, chives, parsley, lemon pepper, chili powder, cajun spice, fresh ginger, or freshly shaved lemon/lime/orange peel, aka zest..
